

So you want to play with Docker? Sweet, let’s help you out. One way is to install Docker on your local machine. After installing, just start a terminal session, type docker run. Et voila!

Online alternatives
Now if you don’t want to install Docker on your own machine, what are the alternatives?
Docker online training
You could try the available online training options, provided by Docker Training. Self-paced training for developers and for system administrators. From the complete list of individual labs simply choose the one you want.
When you start an online training, the sandbox environment is shown on the right.
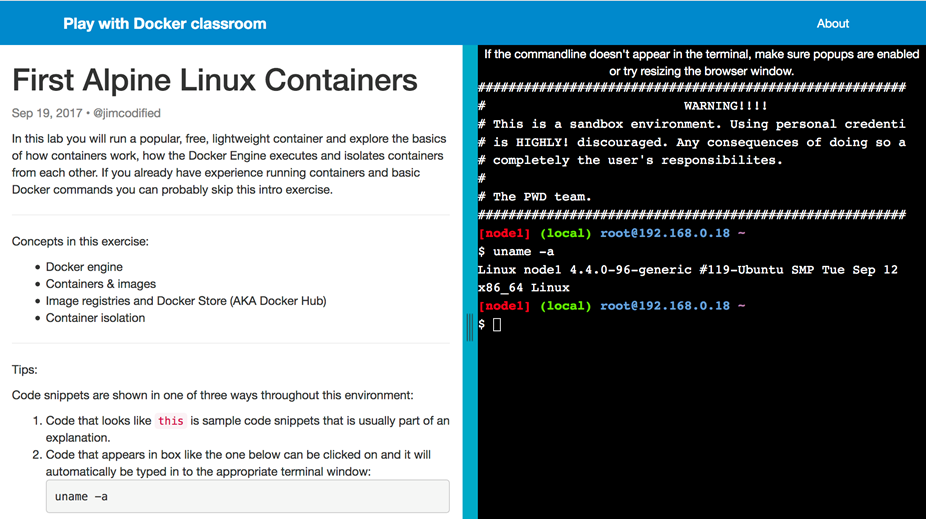
The supplied sandbox adds great value, and you only need a browser to attend class.
Playground
If you want to experiment a bit more, try: https://labs.play-with-docker.com Here you can experiment with images/containers and even with small swarms.
Give it a go? Say you would want to create an image which on startup creates a tar with the content of a directory and put the outcome to that same directory:
After logging in on the playground, create a directory ‘to_tar’. Then create a file which will fix the tar action for you.
cat tar_files.sh
#!/bin/sh
cd /to_tar
# create an archive with relative path: -C (with . !)
tar -cvf “tarred-$(date ‘+%Y%m%d-%H%M%S’).tar.gz” -C /to_tar .
After that, create a dockerfile with the following content:
cat Dockerfile
FROM alpine:latest
VOLUME /to_tar
COPY tar_files.sh /
RUN chmod 750 tar_files.sh
CMD ./tar_files.sh
Create the docker image.
docker build -t tar_creator .
Sending build context to Docker daemon 1.786MB
Step 1/5 : FROM alpine:latest
—> 3fd9065eaf02
Step 2/5 : VOLUME /to_tar
—> Using cache
—> 0bc995e34c38
Step 3/5 : COPY tar_files.sh /
—> b09ba4c5f0ca
Step 4/5 : RUN chmod 750 tar_files.sh
—> Running in 53c4a6428d58
Removing intermediate container 53c4a6428d58
—> 6f5e2aebe529
Step 5/5 : CMD ./tar_files.sh
—> Running in 1e95eb5864f0
Removing intermediate container 1e95eb5864f0
—> 093ea6cac72f
Successfully built 093ea6cac72f
Successfully tagged tar_creator:latest
You see the tar_creator image which has been created. Now run a container from the image with a link to the host OS:
docker run –rm –mount type=bind,source=”$(pwd)”/to_tar,target=/to_tar tar_creator
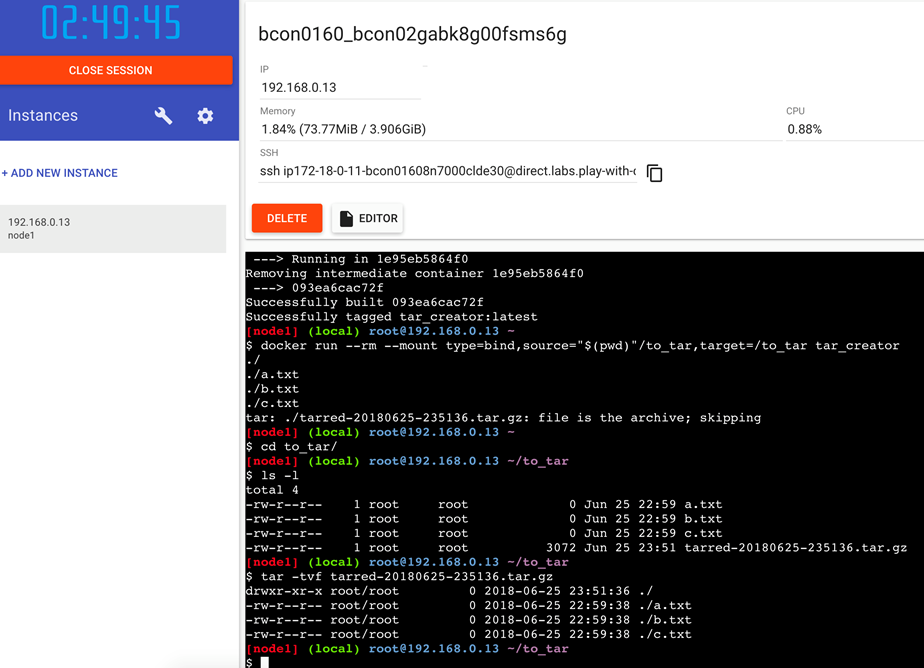
The tar has been created in the /to_tar directory on the host environment. Testing the outcome does not reveal any errors. Test succeeded!
Swarm playground
It is also possible to use swarm mode in this playground. For a nice tutorial to check out how that works, see: https://docs.docker.com/engine/swarm/swarm-tutorial/
As the creation of the managers and workers can be done (in a basic setup) from the playground, you can skip the initial setup actions. This means, for this specific tutorial, you can just start here: https://docs.docker.com/engine/swarm/swarm-tutorial/deploy-service/
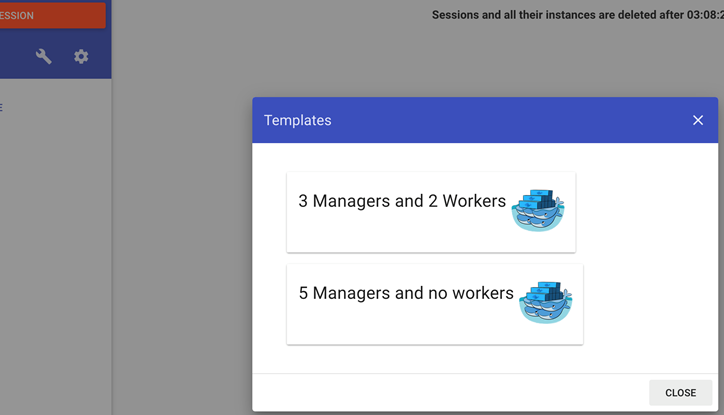
For our test, use the ‘3 managers and 2 workers’ template from the playground.
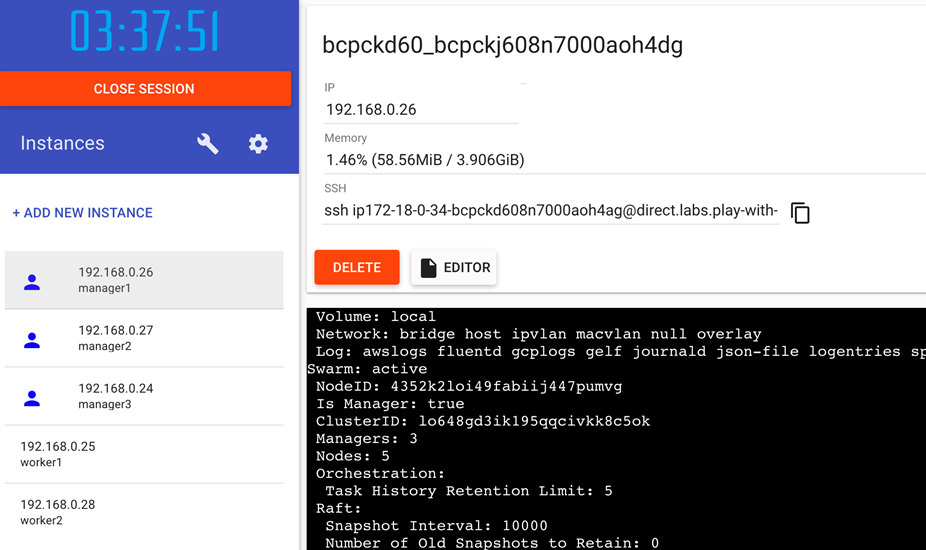
The result will look like this. When issuing the ‘docker info’ command, info as shown below will appear. The swarm is active with 5 nodes and 3 managers.
Check the available nodes from manager1.

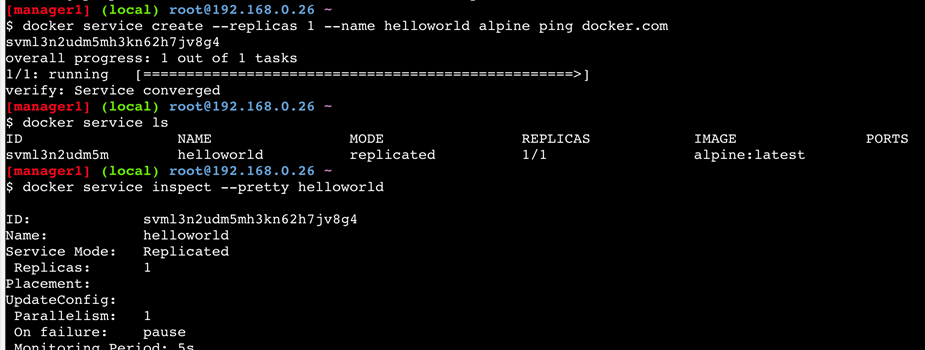
For testing purposes, start a service as described in the tutorial and test if it has been created with ‘docker service ls’. Only 1 instance of the service is created.
Now scale up the number of nodes.
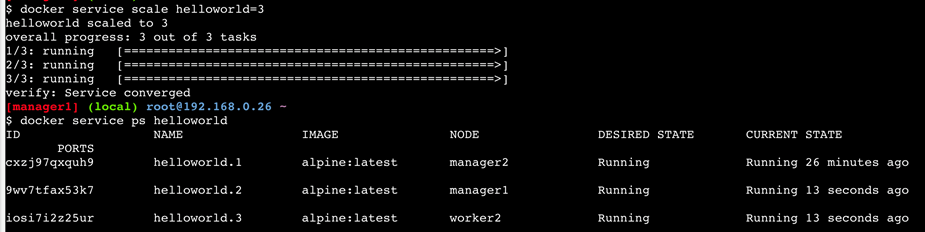
Do another ‘docker service ls’ to see how many replicas are running.

On every node the ‘docker ps’ command is executed, you can see the specific container running on that node.

If the number of replicas is raised to 7, multiple containers will run on particular nodes.

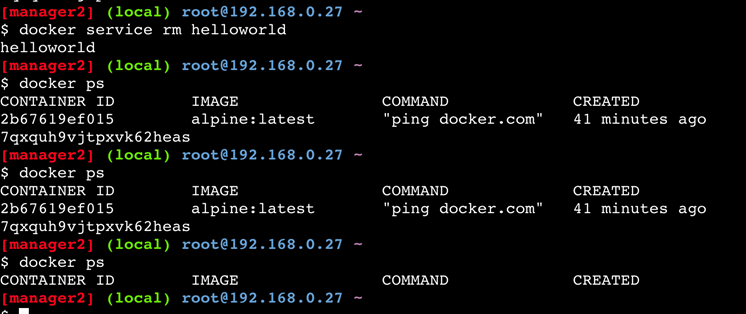
Finally remove the service. This can only be done from one of the managers. After a short while the containers will cease to exist.
Wrap up
As seen in the examples above, the online training possibilities are a great alternative for learning Docker if you do not want to install it on your own machine.
All you need to do is register and you are on your way.
Happy containerizing!


