
If you ever worked with Jenkins Jobs you know it doesn’t take long even for a modest amount of Jobs to turn into an unmanageable bowl of spaghetti. Therefore, to make life a whole lot easier, Jenskins introduced Pipelines.
As the name suggests Pipelines help you streamline multiple Jobs, and allows for versioning. A sample of which I’m happy to show you in the following introductory walkthrough.
Freestyle
Initially Jenkins consisted of Jobs created directly from the GUI. Plugins exist to keep track of changes on these jobs.
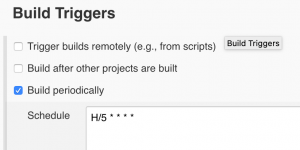
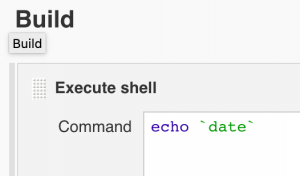
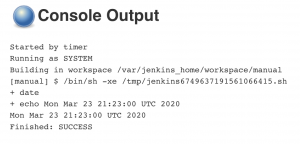
Let’s say you would like your Jenkins instance to run every 5 minutes and display the time in its log. In that case a ‘Freestyle project’ would be started with only a filled in ‘Build trigger’ and a command for build execution.
When started, the result is a job which runs every 5 minutes.
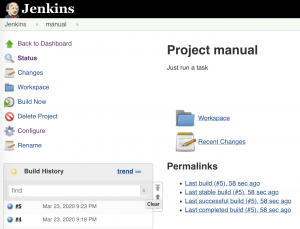
And the output of every run shows up in the log.
Easy does it, but imagine having to manage dozens of these. Individually…
Pipelines
Enter Pipelines. Pipelines are created in Groovy script, in the GUI as well. Making it easier to control a lot of different actions, so, even if you think you will not run that many Jobs, why not start here? Even with as little as one Job.
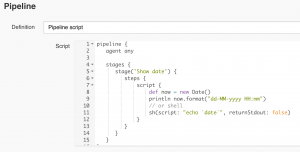
For the simple ‘show date’ activity the script looks like this.
And the output:
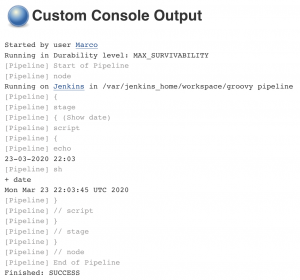
Without cleaning, the output can be quite extensive. But not to worry, you can solve this with a cron-like solution.
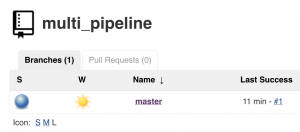
Multibranch pipeline
Next up, Jenkinsfiles can be stored in source code management (SCM) systems, like Github. Where every git branch is seen as a separate pipeline, to run automatically if required.
Adding the pipeline script from above to a Jenkinsfile, results in a successful run like before:

The biggest difference will be the SCM checkout. This is added as an extra stage next to the ‘Show date’ stage.
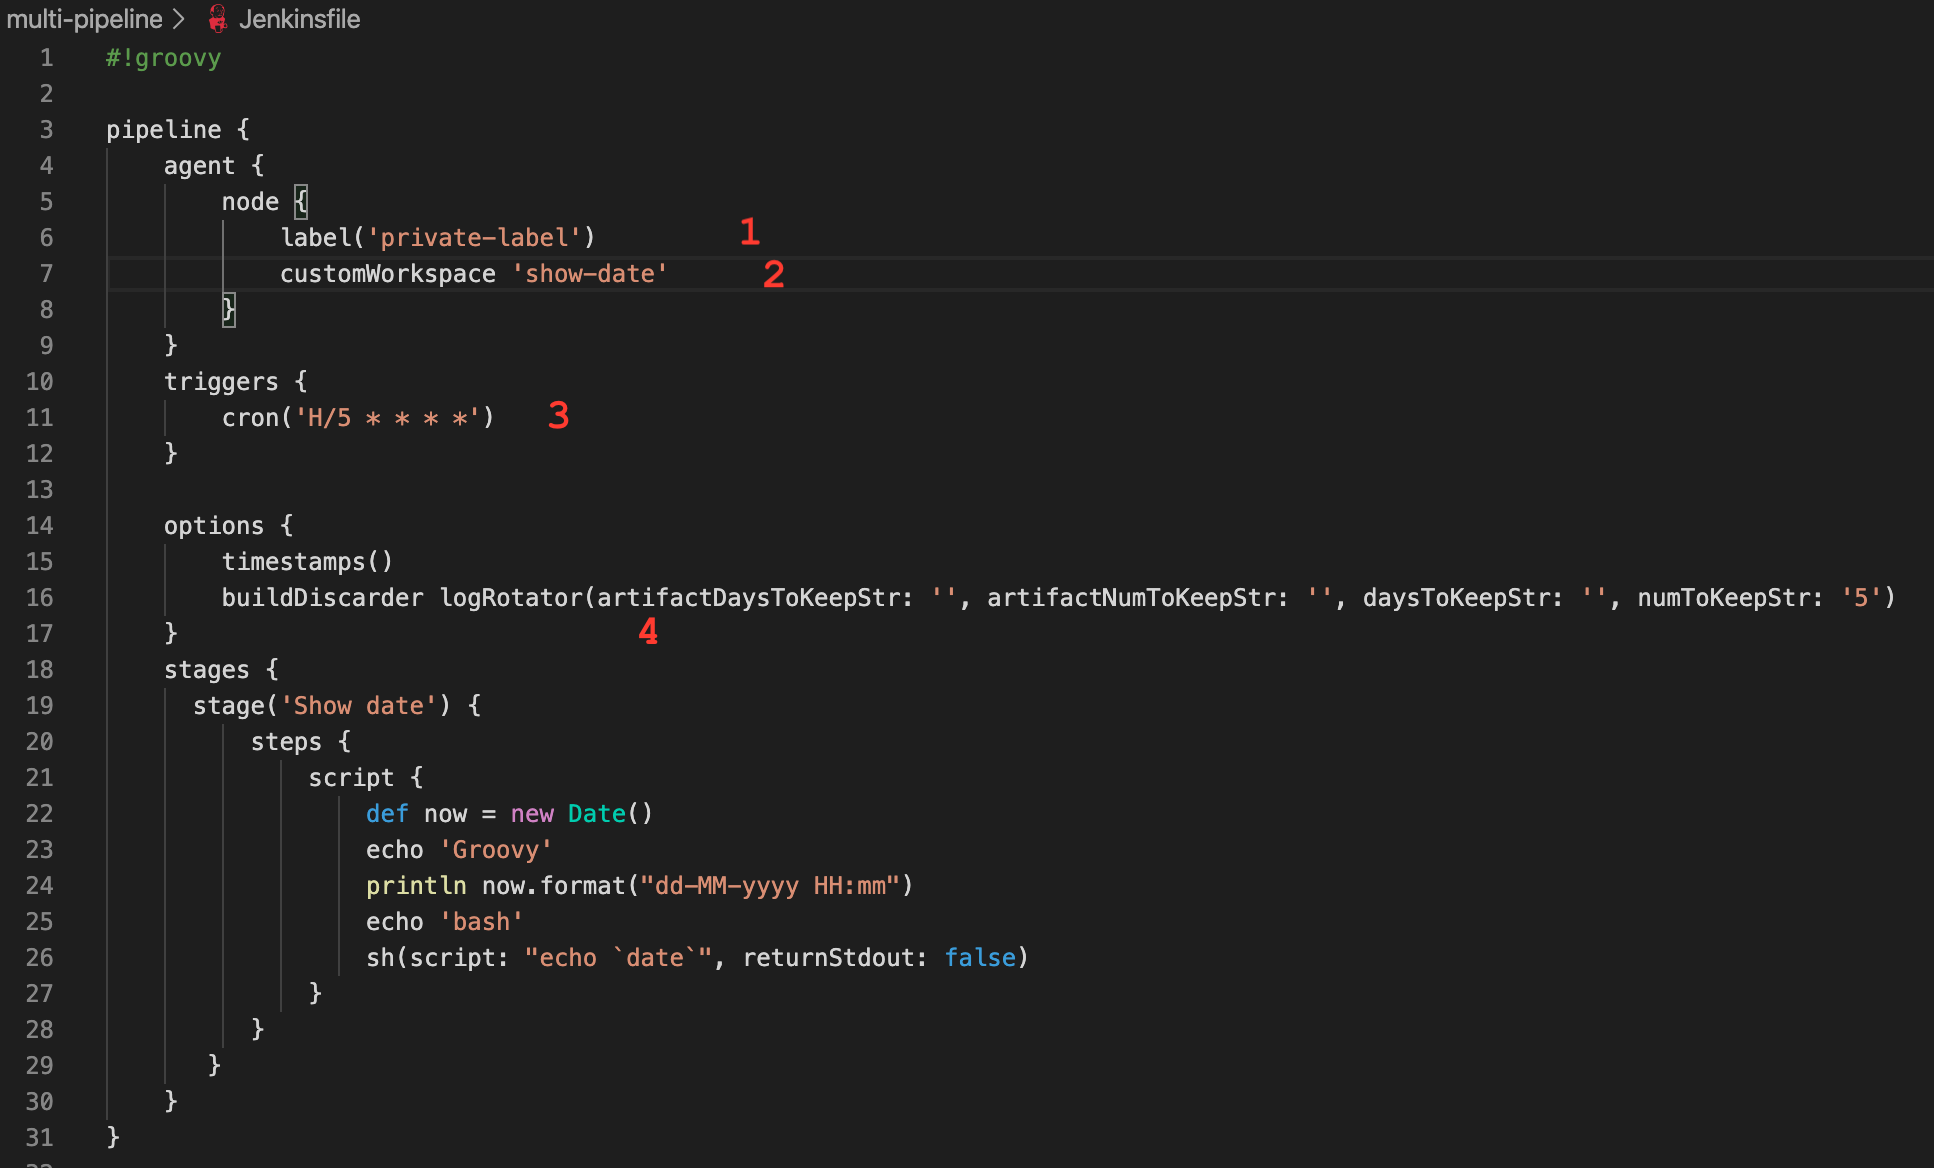
Now, let’s create a branch, for instance because some changes are needed. The Jenkinsfile is adjusted in several places;
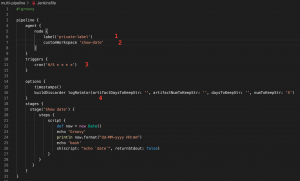
- A label is added to run the job on a specific node.
- A workspace is added to assign a specific directory where the output of the job is put.
- The 5-minute repeat is added by a ‘cron’ trigger.
- Log rotation is added. In this case, the number of jobs to keep is 5. Another option would be to have several days of logging available for analysis.
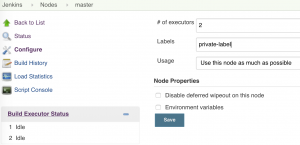
A ‘private-label’ is attached to a node in Jenkins. This ensures the job runs on this labeled node:
After pushing the branch to Github, the new branch is detected.

The ‘mb_1’ branch will run next to the ‘master’ runs. If it fits the purpose, it can be merged with the master. Ensuring versioning of your pipeline and easy track and trace of changes.
Enjoy!


