
When you work in a complex environment with more than a dozen developers, enforcing standards is not that easy. Of course, all modern editors (like VSCode) have plugins available doing linting on Java, Yaml, Puppet, etc.
Unfortunately, it is hard to check the actual usage of those plugins.
That’s why we thought of a way to do a check on submitted source code.
The following requirements were set. We want to:
- puppet validate (delivered with puppet agent software)
- puppet-lint (installed with gem)
- yamllint (installed with pip3)
- use a docker container with a minimal setup
We, therefore, created a docker image using the Dockerfile below and put the image in a (local) registry:
# Dockerfile for validation image
# Does code linting and validation

FROM alpine:3.9
ENV PUPPET_AGENT_VERSION="5.3.2"
RUN \
    apk update \
 && apk add --no-cache openssh-client \
                       git \
                       ruby \
                       ruby-rdoc \
                       ruby-json \
                       ruby-etc \
                       shadow \
                       less \
                       bash \
                       python3 \
                       py3-pip \
 && gem install puppet:${PUPPET_AGENT_VERSION} --no-rdoc --no-ri \
                puppet-lint --no-rdoc --no-ri \
                r10k --no-rdoc --no-ri \
 && pip3 install yamllint \
 && grep ns_users /etc/group || groupadd ns_users

COPY root /root/

WORKDIR /root/.ssh/
RUN ssh-keyscan -p 7999 ns-bitbucket.dev.infosupport.net >> known_hosts \
 && chmod 500 /root/.ssh \
 && chmod 400 *

WORKDIR /etc/puppetlabs/code/environments/
The root folder contains some ssh info and the linting check files for Puppet (.puppet-lint.rc) and Yaml (configuration.yaml) files. See examples of those files below.
.puppet-lint.rc
--no-autoloader_layout-check
--no-variable_is_lowercase-check
configuration.yaml
extends: default

rules:
  braces:
    level: warning
    max-spaces-inside: 1
  brackets:
    level: warning
    max-spaces-inside: 1
  # For readablity, multiple spaces can exist after a colon.
  colons: disable
    # For readabilaty
  commas:
    level: warning
  comments: disable
  comments-indentation: disable
  document-start: disable
  empty-lines:
    level: warning
  hyphens:
    level: warning
  indentation:
    level: warning
    indent-sequences: consistent
  line-length:
    max: 120
    level: warning
    allow-non-breakable-inline-mappings: true
  truthy: disable
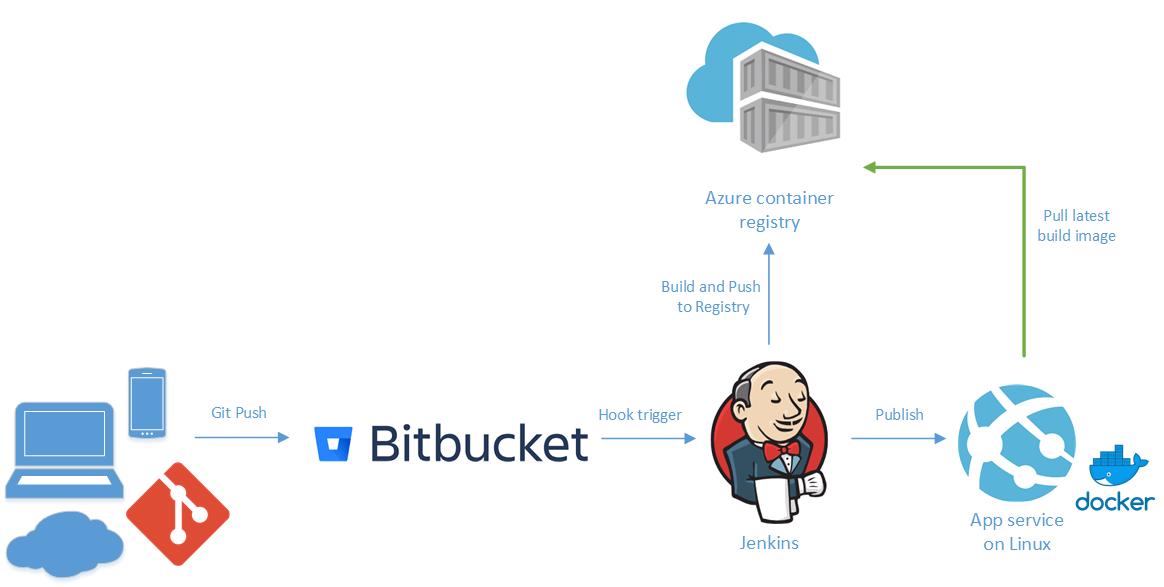
Now we are ready with the setup. The next leap is to implement activation of the linting ‘microservice’.
From Bitbucket it is possible to create webhooks. When configured correctly, these webhooks can react to the creation of pull-requests.
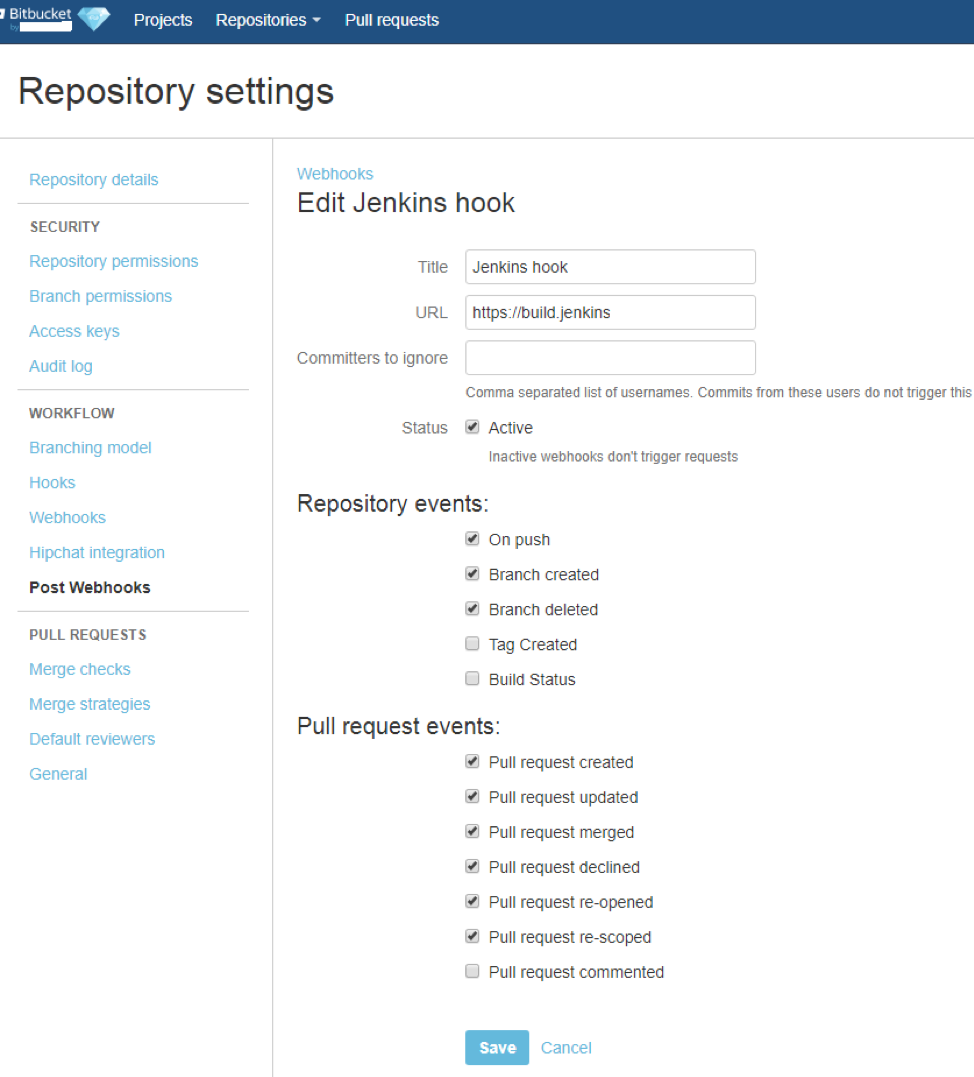
When a pull request is created, this action results in a signal towards Jenkins. Jenkins has rich functionality to show such requests, but needs the Bitbucket branch source plugin to do so.
When configured as is shown in the documentation of the plugin, the result of a pull request creation is:
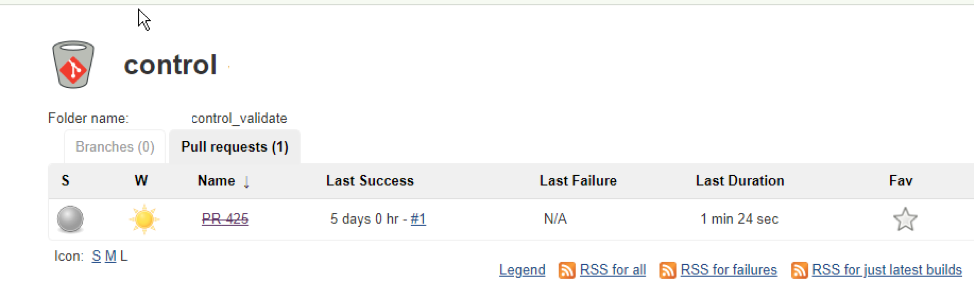
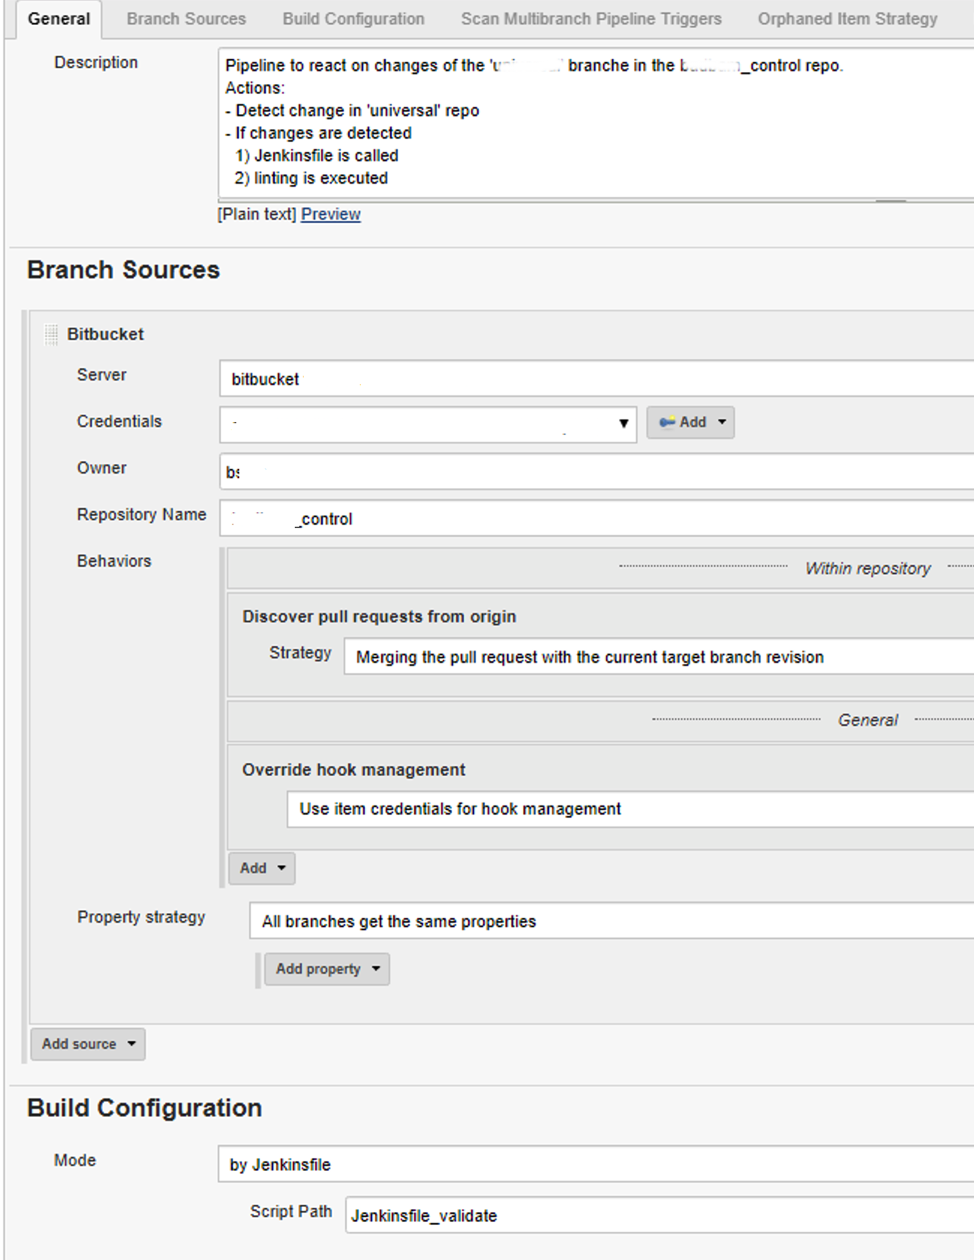
This is the moment the real action happens. The Bitbucket repository contains a Jenkins file, which is configured as shown in the beforehand picture. As you see, the creation of the pull request triggers the execution of a Jenkins file.
Jenkins starts periodically (about every minute) and starts executing what is recorded in the Jenkinsfile. The result in our case is execution of the puppet validation and linting followed by yaml linting.
In our case, the setup of Jenkinsfile for validation is:
1) pull validation image and start container
2) check changed files from pull request
2a) validate puppet file
2b) puppet lint
2c) yaml lint
3) publish results to Bitbucket
In the end, the creation of a pull request will – in case of errors – result in a comment on that pull request. How cool is that! And this is only one of the possible implementations. The sky is the limit.


