

Azure Pipelines is great tooling when using pipelines. With an immense number of features, integrations and options. However, not all info on those near endless possibilities is easy to find. Let’s help out. Today I will focus on the possibilities at the startup of a pipeline run.
In this blog the assumption is that you are not completely new to YAML, and you are able to run (basic) pipelines in Azure.
Do some debugging
How many times have you wished for some extra info when a run fails? This extra info can be easily obtained by adding a system variable in the pipeline. To do so, add a variable with the name ‘system.debug’ in the edit mode. A default value is given (true or false).

If you want it to be adjustable at runtime, select the ‘Settable at queue time’ checkbox.
Running YAML Pipelines
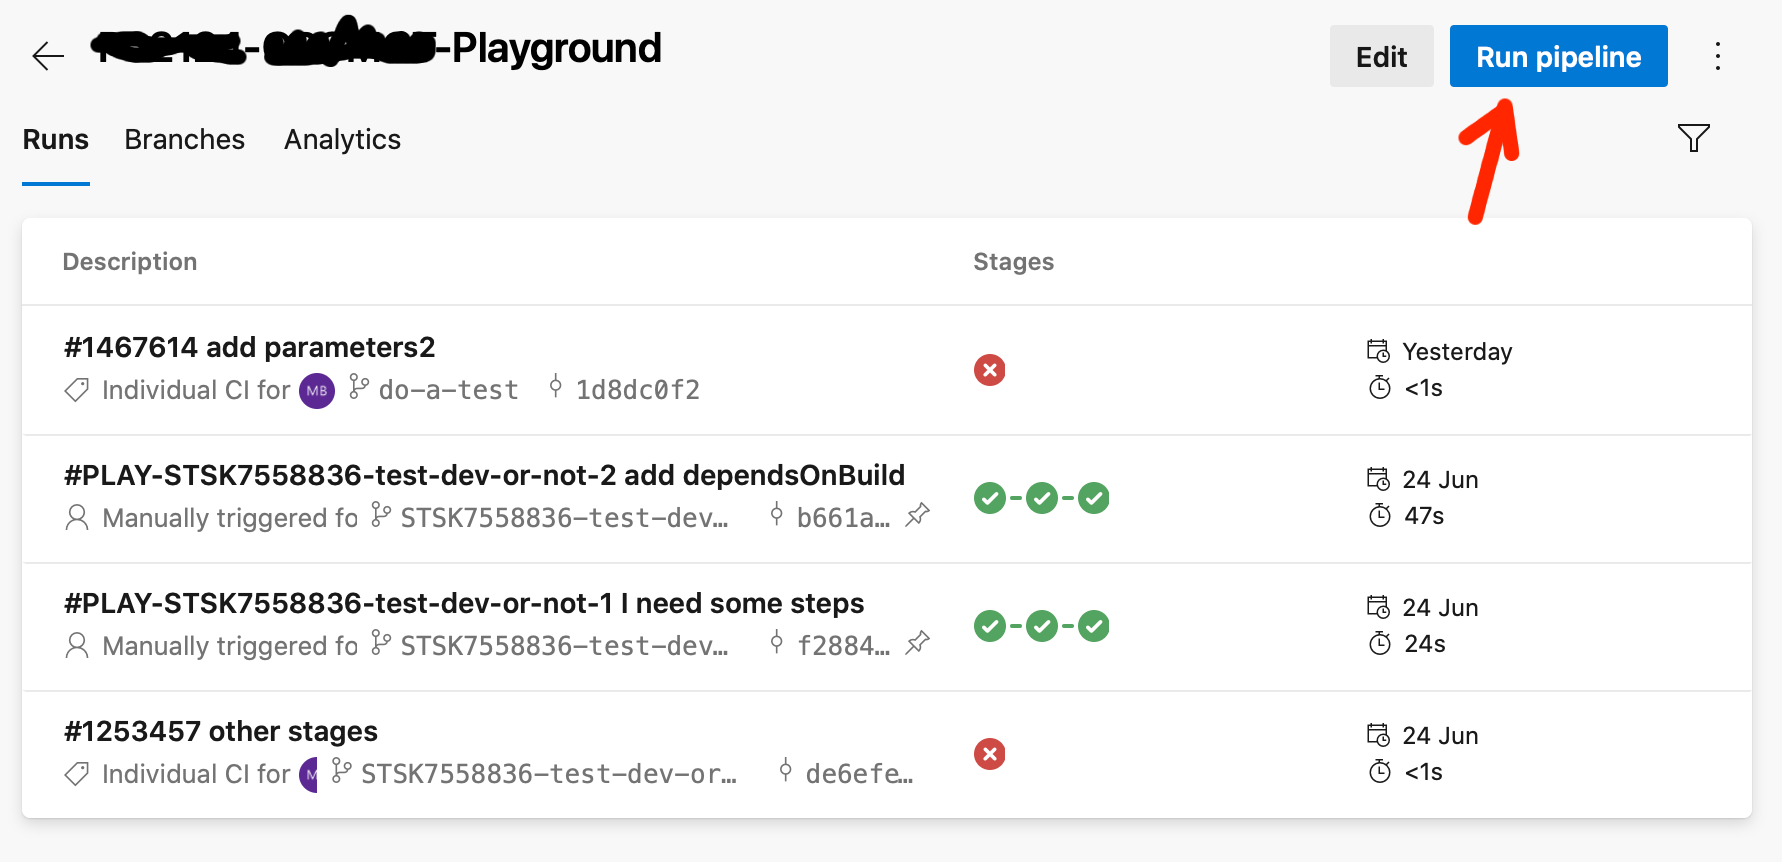
Now you are ready to start the run with some added debugging. To do so, press the ‘Run pipeline’ button.
Before the run starts, there is a pop-up with a few options to choose from.
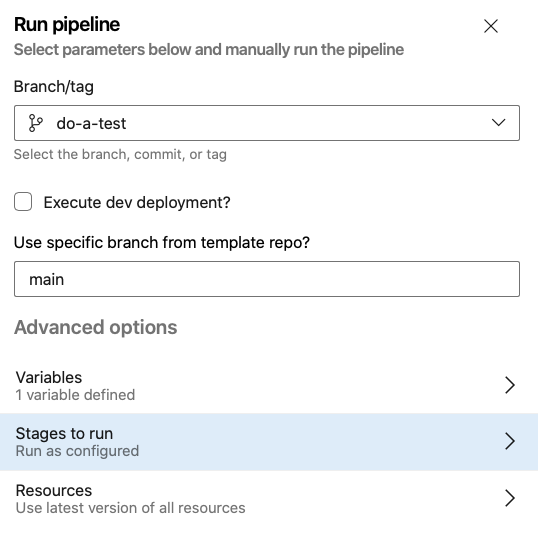
The first selection to make, is the branch or tag you would like the pipeline to run from. Most of the time, this will be your feature branch.
Pipeline parameters
The next items shown in the pop-up, are parameter options which are added to this pipeline.
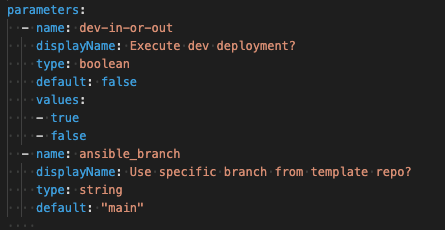
In this specific case two types of parameters are added. The first one is a parameter with a true/false option (default unchecked), the second one contains a free format text field parameter (default ‘main’). How cool is that?! It means you can choose what stage you like to run. E.g. if you made changes to the template repo, it is possible to choose a branch different from ‘main’.
Pipeline variables
In the next part of the pop-up, you see the ‘Variables’ option. The variable ‘system.debug’ is presented here. As you notice, the default value is ‘true’.
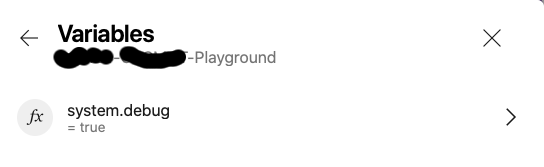
When you push the ‘>’ next to the variable, you get the option to change the value of the variable.

Run stages
Selecting ‘Stages to run’ reveals a new section The stages to run or skip – be aware of dependencies – are chosen from this next option. As in the parameter section the ‘Execute dev deployment?’ was omitted, only the ‘BUILD PLAY’ and ‘TST1 – Deploy PLAY with Ansible’ are available for selection. Choose wisely!

Resources
The last option before starting, concerns the used resources. These resources can consist of downloadable artifacts from another pipeline, or repositories used as templates.
When selecting the resources option, all linked resources are shown.
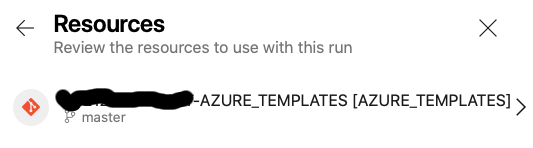
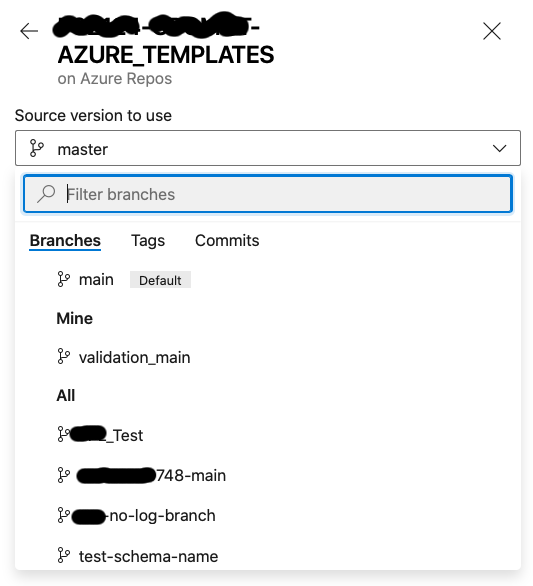
For all available resources, you can alter the branch to use. After clicking the ‘>’ on the right, a page is shown where you choose a desired branch for the specific resource.
Run for success
You are good to go. Give it a try and let me know how it works for you?
PS Would you like to read more on the efficiency and flexibility that Azure DevOps CI/CD Pipeline options bring to YAML based pipelines? Simply follow Techforce1 on LinkedIn!


