
Though MobaXterm – unfortunately only for Windows – is a comprehensive tool already, you might not know all of its potential.
Let’s do something about that, shall we? For instance with this little trick that helps you locate your position.
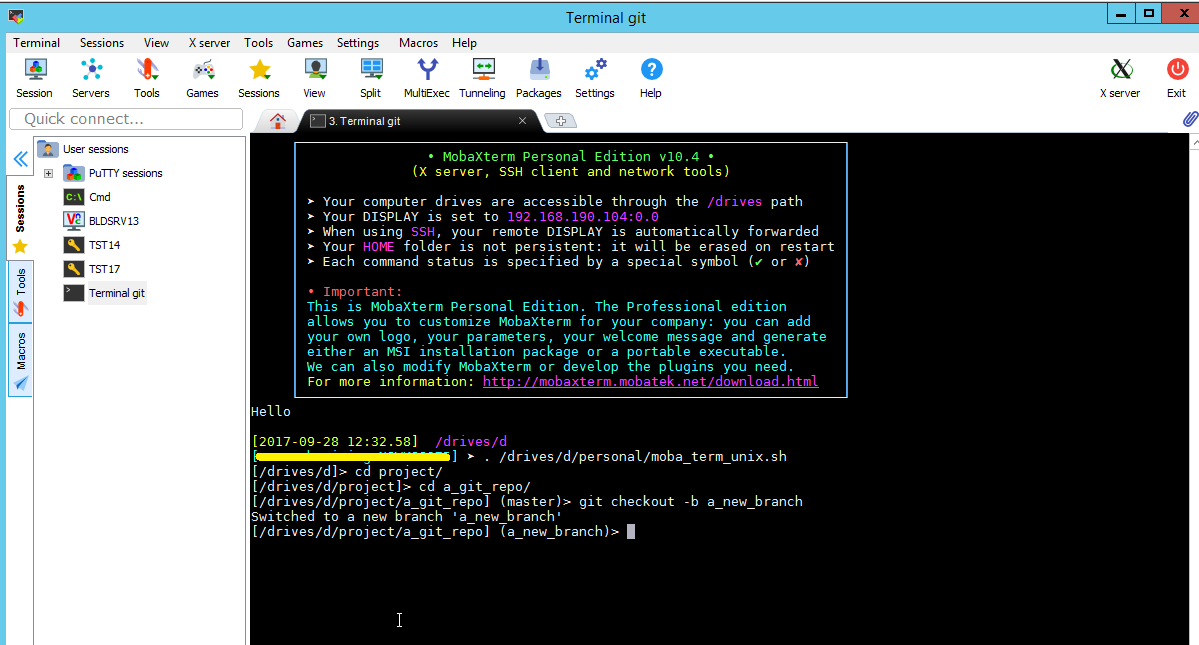
Below I use the Shell session (in Bash mode) to access a Git repository. When working on a specific branch, it is useful to see where you are at.
This is accomplished by adjusting the prompt inside the shell.
Nifty! Check the explanation below to see how to accomplish this.
From the settings menu, select ‘Shell’. Choose ‘Bash’ as terminal shell and open the ‘Advanced Shell settings’ tab. Here you can enter commands, but the one for changing the prompt is not applicable. It is overruled when the shell is opened.
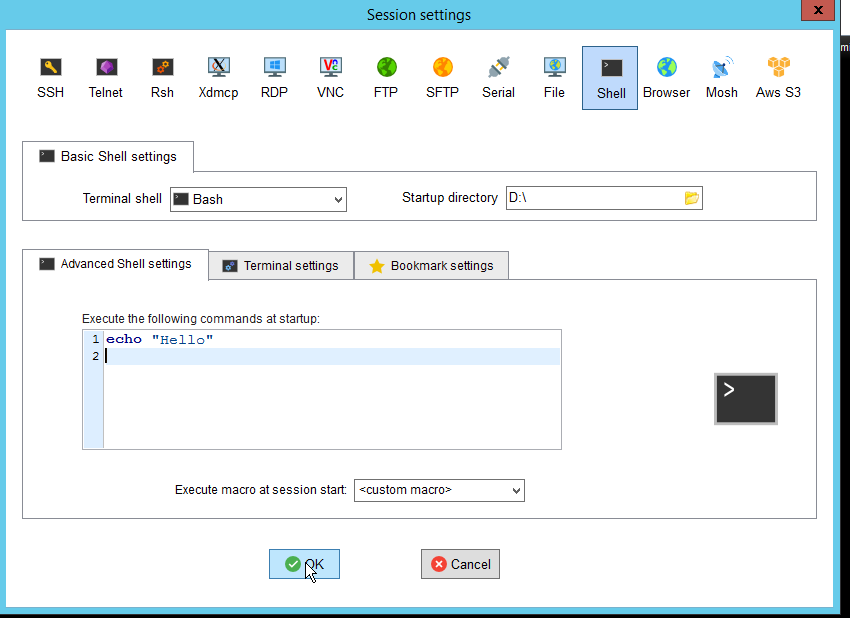
The ‘Execute macro at session start’ offers a solution. The actions created there are executed after the session has started off.
First create a file with the following content:
#!/bin/bash
parse_git_branch() {
git branch 2> /dev/null | sed -e ‘/^[^*]/d’ -e ‘s/* \(.*\)/ (\1)/’
}
# Overrule the prompt settings
export PS1=”[\${PWD}]\$(parse_git_branch)> “
In this case it is named ‘moba_term_unix.sh’. Note that the file has to be in unix file format. To be sure it is, create the file from a bash shell in MobaXterm itself.
Next up, save it to a location, where you can use the file in future sessions. Execute chmod +x moba_term_unix.sh to secure file execution is possible.
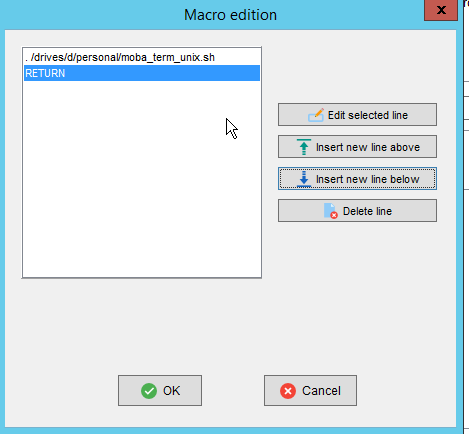
Now select the <custom macro> option and add the following two entries:
1) the location of initialization file
2) the ‘RETURN’ option – this can be selected as a key stroke
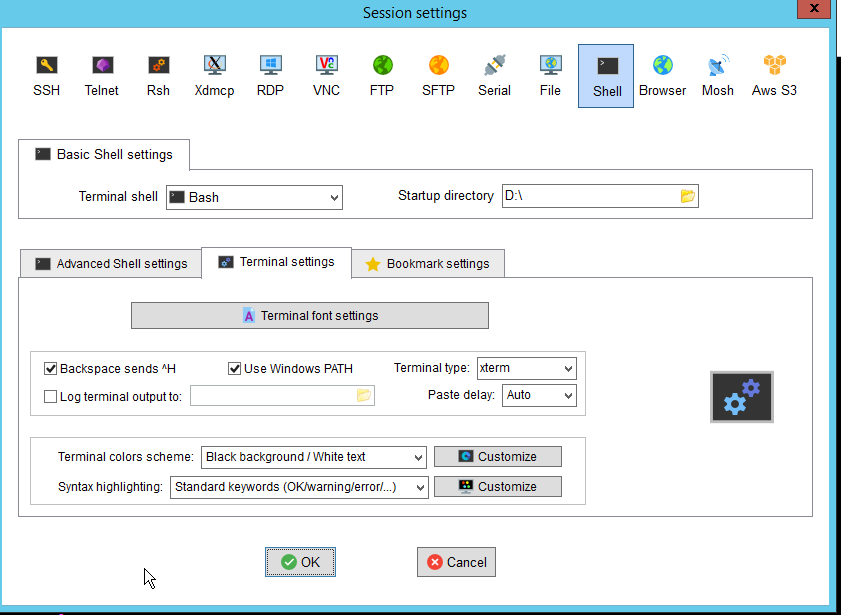
Last but not least, it is of great importance to select the ‘Use Windows Path’ option in the ‘Terminal settings’ tab.
Without it important commands and tools – like Git – cannot be reached.
Now start a new terminal session from MobaXterm.
When you move to a directory on the filesystem, which is under git version control, you will see the final result.


